Quick Start
In order to help new users begin scanning as quickly as possible, JoeScan provides the application JsSetup with each software release. This program allows an engineer or technician to control a scanner using a graphical user interface for testing and evaluation purposes.
Requirements
Before beginning, make sure the following items are on hand and ready for use.
-
RJ45 ethernet cable (standard Cat6 or better patch cable)
-
Computer with RJ45 network interface
Other JoeScan devices normally used within a complete scan system, such as the ScanSync, can be left aside for this exercise.
Setup
Hardware Setup
The following steps show how to prepare the hardware for use with JsSetup.
-
Record the JS-50’s serial number found on the side of the body; the serial number is the primary key used to identify and interface with JoeScan JS-50s.
-
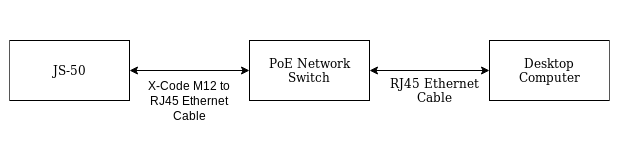
Using the X-Code M12 to RJ45 ethernet cable, connect the M12 connector to the JS-50 and the RJ45 connector to the PoE network switch. Ensure that the port on the network switch is PoE capable and can provide power to the JS-50.
-
Connect the RJ45 ethernet cable to a PoE capable port on the network switch and the desktop computer.
-
Confirm that everything is set up in the manner according to the diagram below.
-
Position the JS-50 such that it is pointed away from all people and aimed at a static non-reflective target within the field of view (see datasheet for your model).
Computer Setup
After configuring the necessary hardware, the next step is to configure the computer used to run JsSetup.
-
Download the latest software from Developer Portal Release page and unzip the contents.
-
Temporarily disable Windows Defender firewall following the instructions in the Firewall Settings article. It is possible to allow JsSetup and other JS-50 software applications to be granted access through the firewall, but initially, we will disable the firewall for simplicity’s sake. JsSetup also has a built-in firewall checker that will alert you if there is a problem with your installation.
-
Temporarily disable any third party antivirus software. If desiring to use antivirus software on a computer that will be running JS-50 software applications, it is recommended to consult with the antivirus software’s documentation to ensure that it does not hinder scanning.
-
Confirm that the network interface going out to the JS-50 has a link local address by referring to the instructions listed on the IP Addressing page.
Running JsSetup
With hardware and software setup completed, the next step is to launch JsSetup and start scanning.
-
Launch the executable
JsSetup.exelocated within the software release unzipped previously in the Computer Setup instructions. The JsSetup exe is digitally signed, and should not trigger a warning by Windows Security, if it does, you can chooseRun anyway. -
Upon startup, JsSetup displays the following dialog:
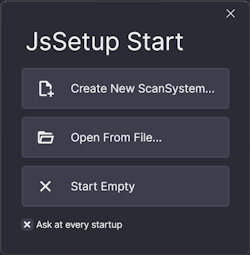 .
.
Click onCreate New ScanSystem.... -
You will see the New ScanSystem dialog:
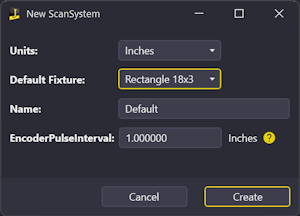
You can leave all fields at their defaults for now. Click
Create. -
JsSetup now shows the main interface:
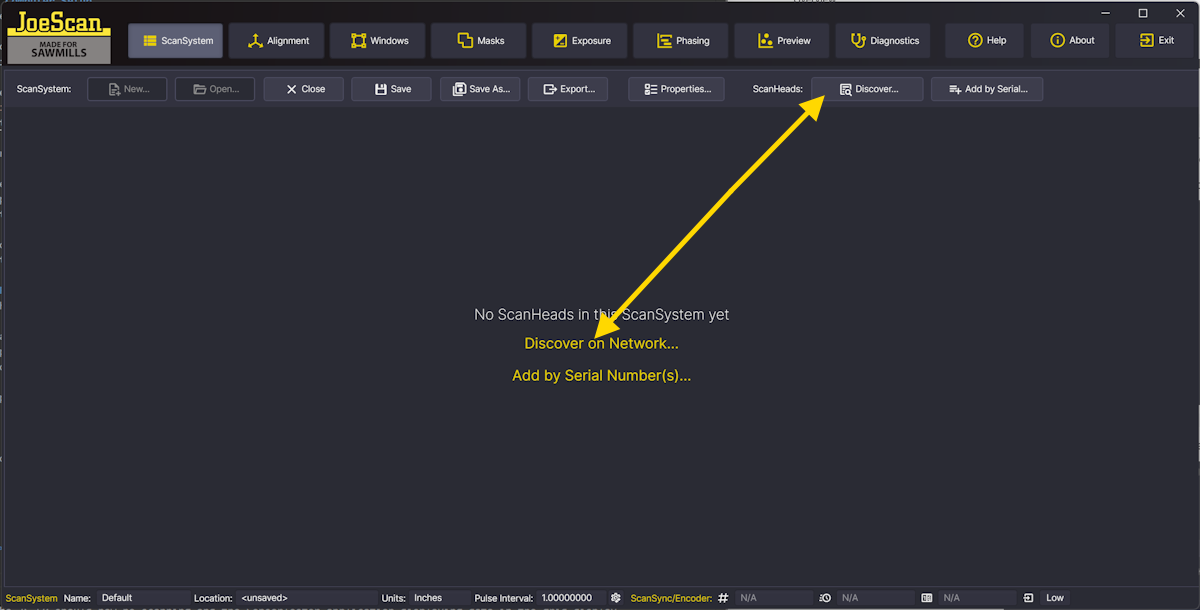
Click on either the text
Discover on Network...text OR theDiscover...button on the toolbar. They do the same thing. -
The Discover and Add dialog is show, listing all JS-50 on your local network:

Select your JS-50 from the list, and click
Add. -
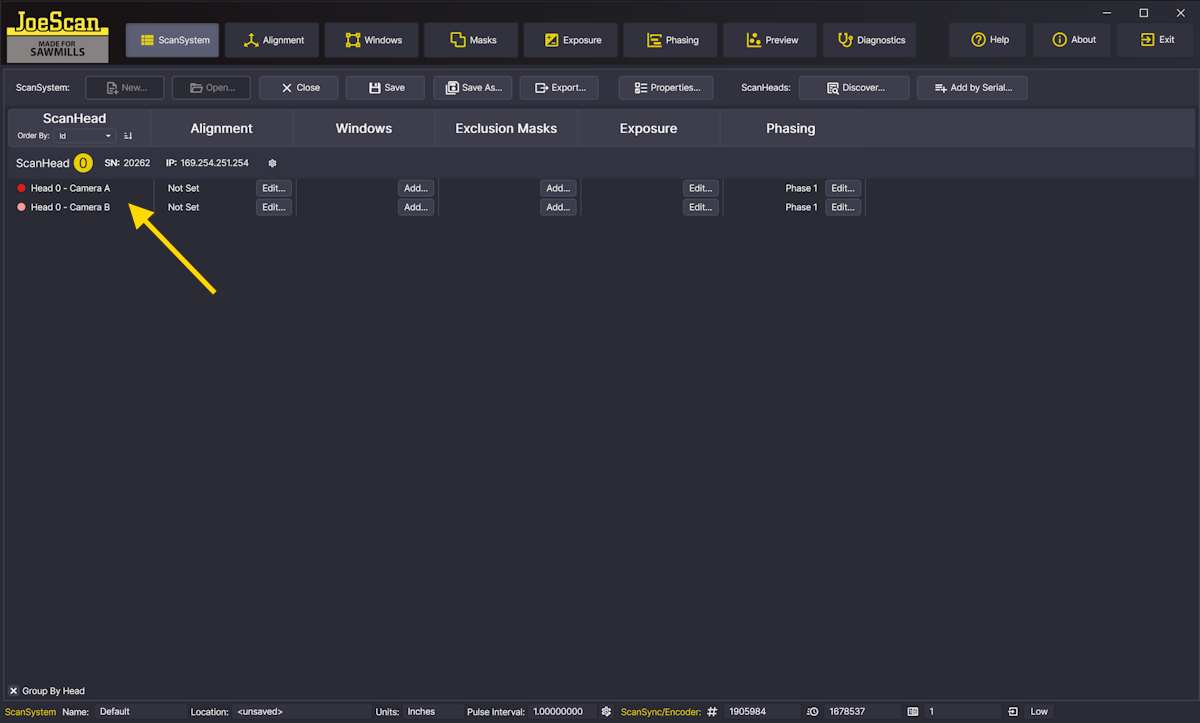
Your ScanHead is now shown in the list. Depending on the model, you may see different Camera/Laser pairs, but that can be ignored for now:
-
Switch to the Preview tab by clicking the corresponding button in the toolbar:
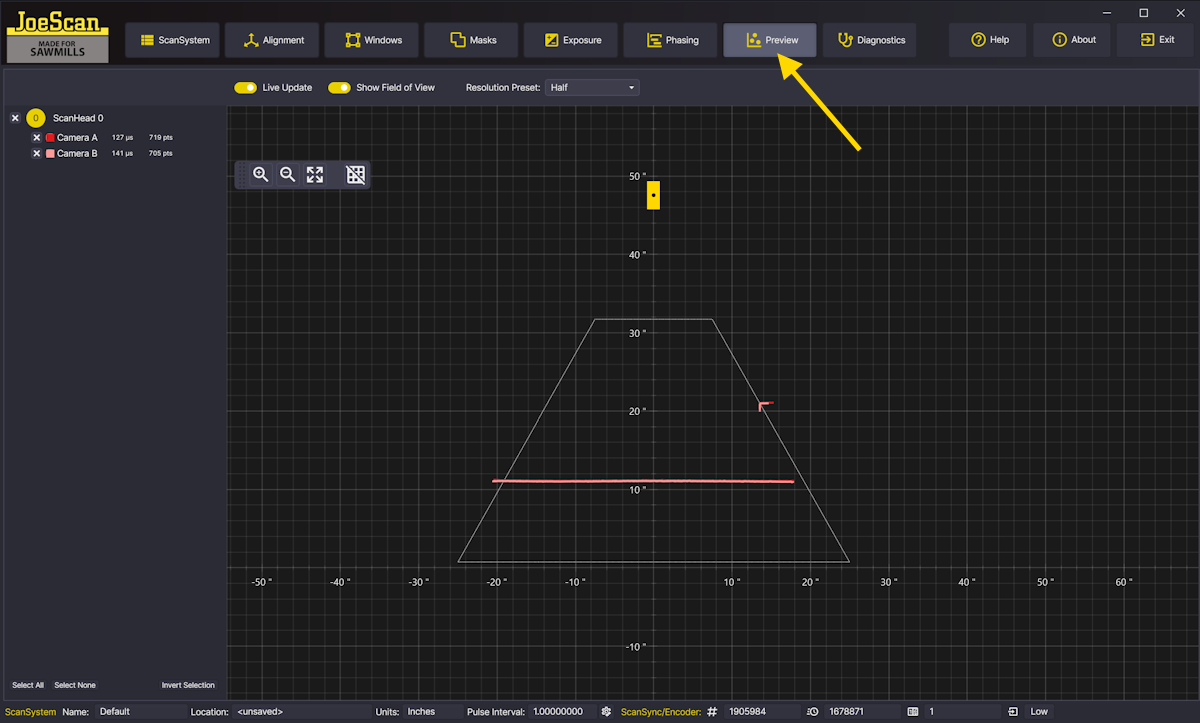
You should now see a live preview of the data returned by the ScanHead. Move your hand or some object in the field of view to verify.
This concludes the quick function test. There are many more functions available in JsSetup. Check the documentation for more information.
Troubleshooting
JS-50 does not power up
- Ensure that the JS-50 is plugged into a port capable of delivering power on a Power over Ethernet (PoE) capable network switch. Check the Diagnostics, Cabling and Switch pages for more information.
ScanHead is not shown in the Discover and Add dialog
- Ensure the firewall and network are configured properly. Use of
pingandipconfigas described in the IP Addressing article can be used to test the ability of the client PC to be able to reach a given JS-50. You can also try to add the ScanHead by Serial Number on the main JsSetup screen.
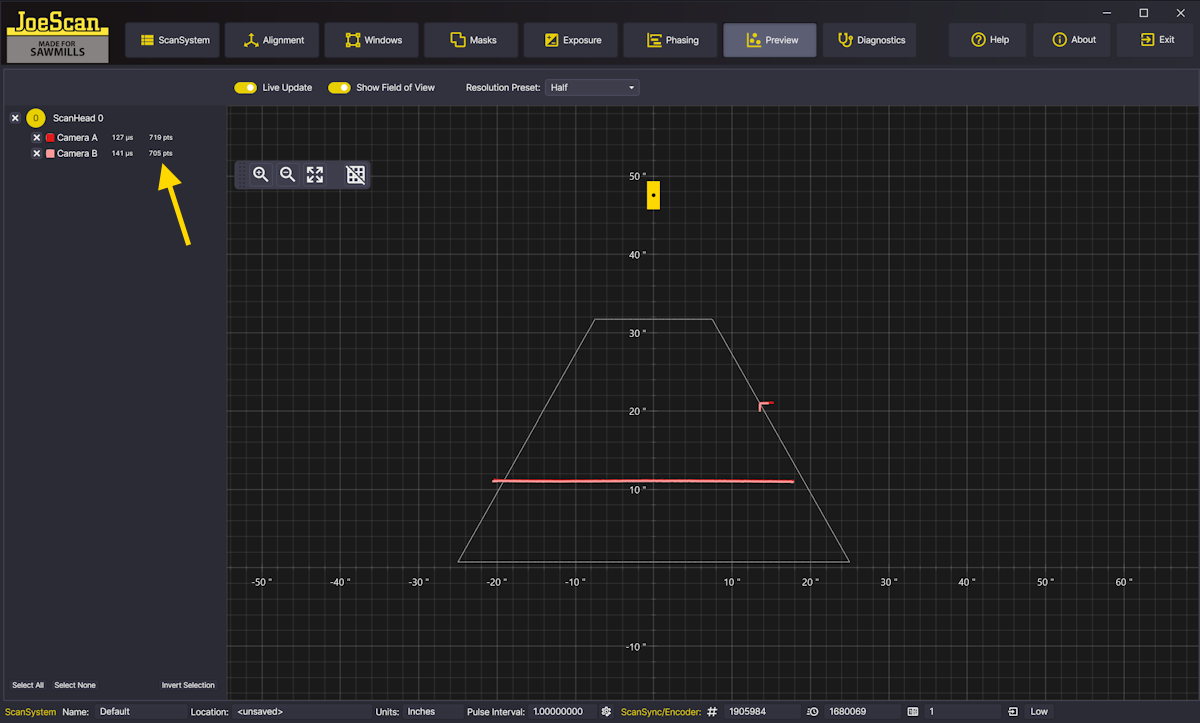
JsSetup connects, but I don't see any data in Preview
- Make sure an object is in the field of view and that neither camera not laser are obstructed. Check in the Preview tab that the ScanHead returns valid points. The list of ScanHeads on the left shows the number of valid points:
Continued difficulties
- Contact your JoeScan representative and we'll provide one on one assistance to ensure scanning success.