Window Editor Workspace
The Window Editor Workspace allows you to create, edit and assign Scan Windows.
Overview
Scan Windows are configurable regions which can be used to exclude regions from being considered when scanning. Anything that is outside of the defined window will not be detected by the scanner while scanning; allowing the scan head to ignore regions that could result in spurious data.
Within the Pinchot API, Scan Windows are defined as polygons which must fulfil the following conditions:
- have at least 3 vertices
- must be convex
- must be wound (ordered) clockwise
JsSetup allows the user to create a ScanWindow for each Camera-Laser Pair and automatically enforces above constraints.
User Interface
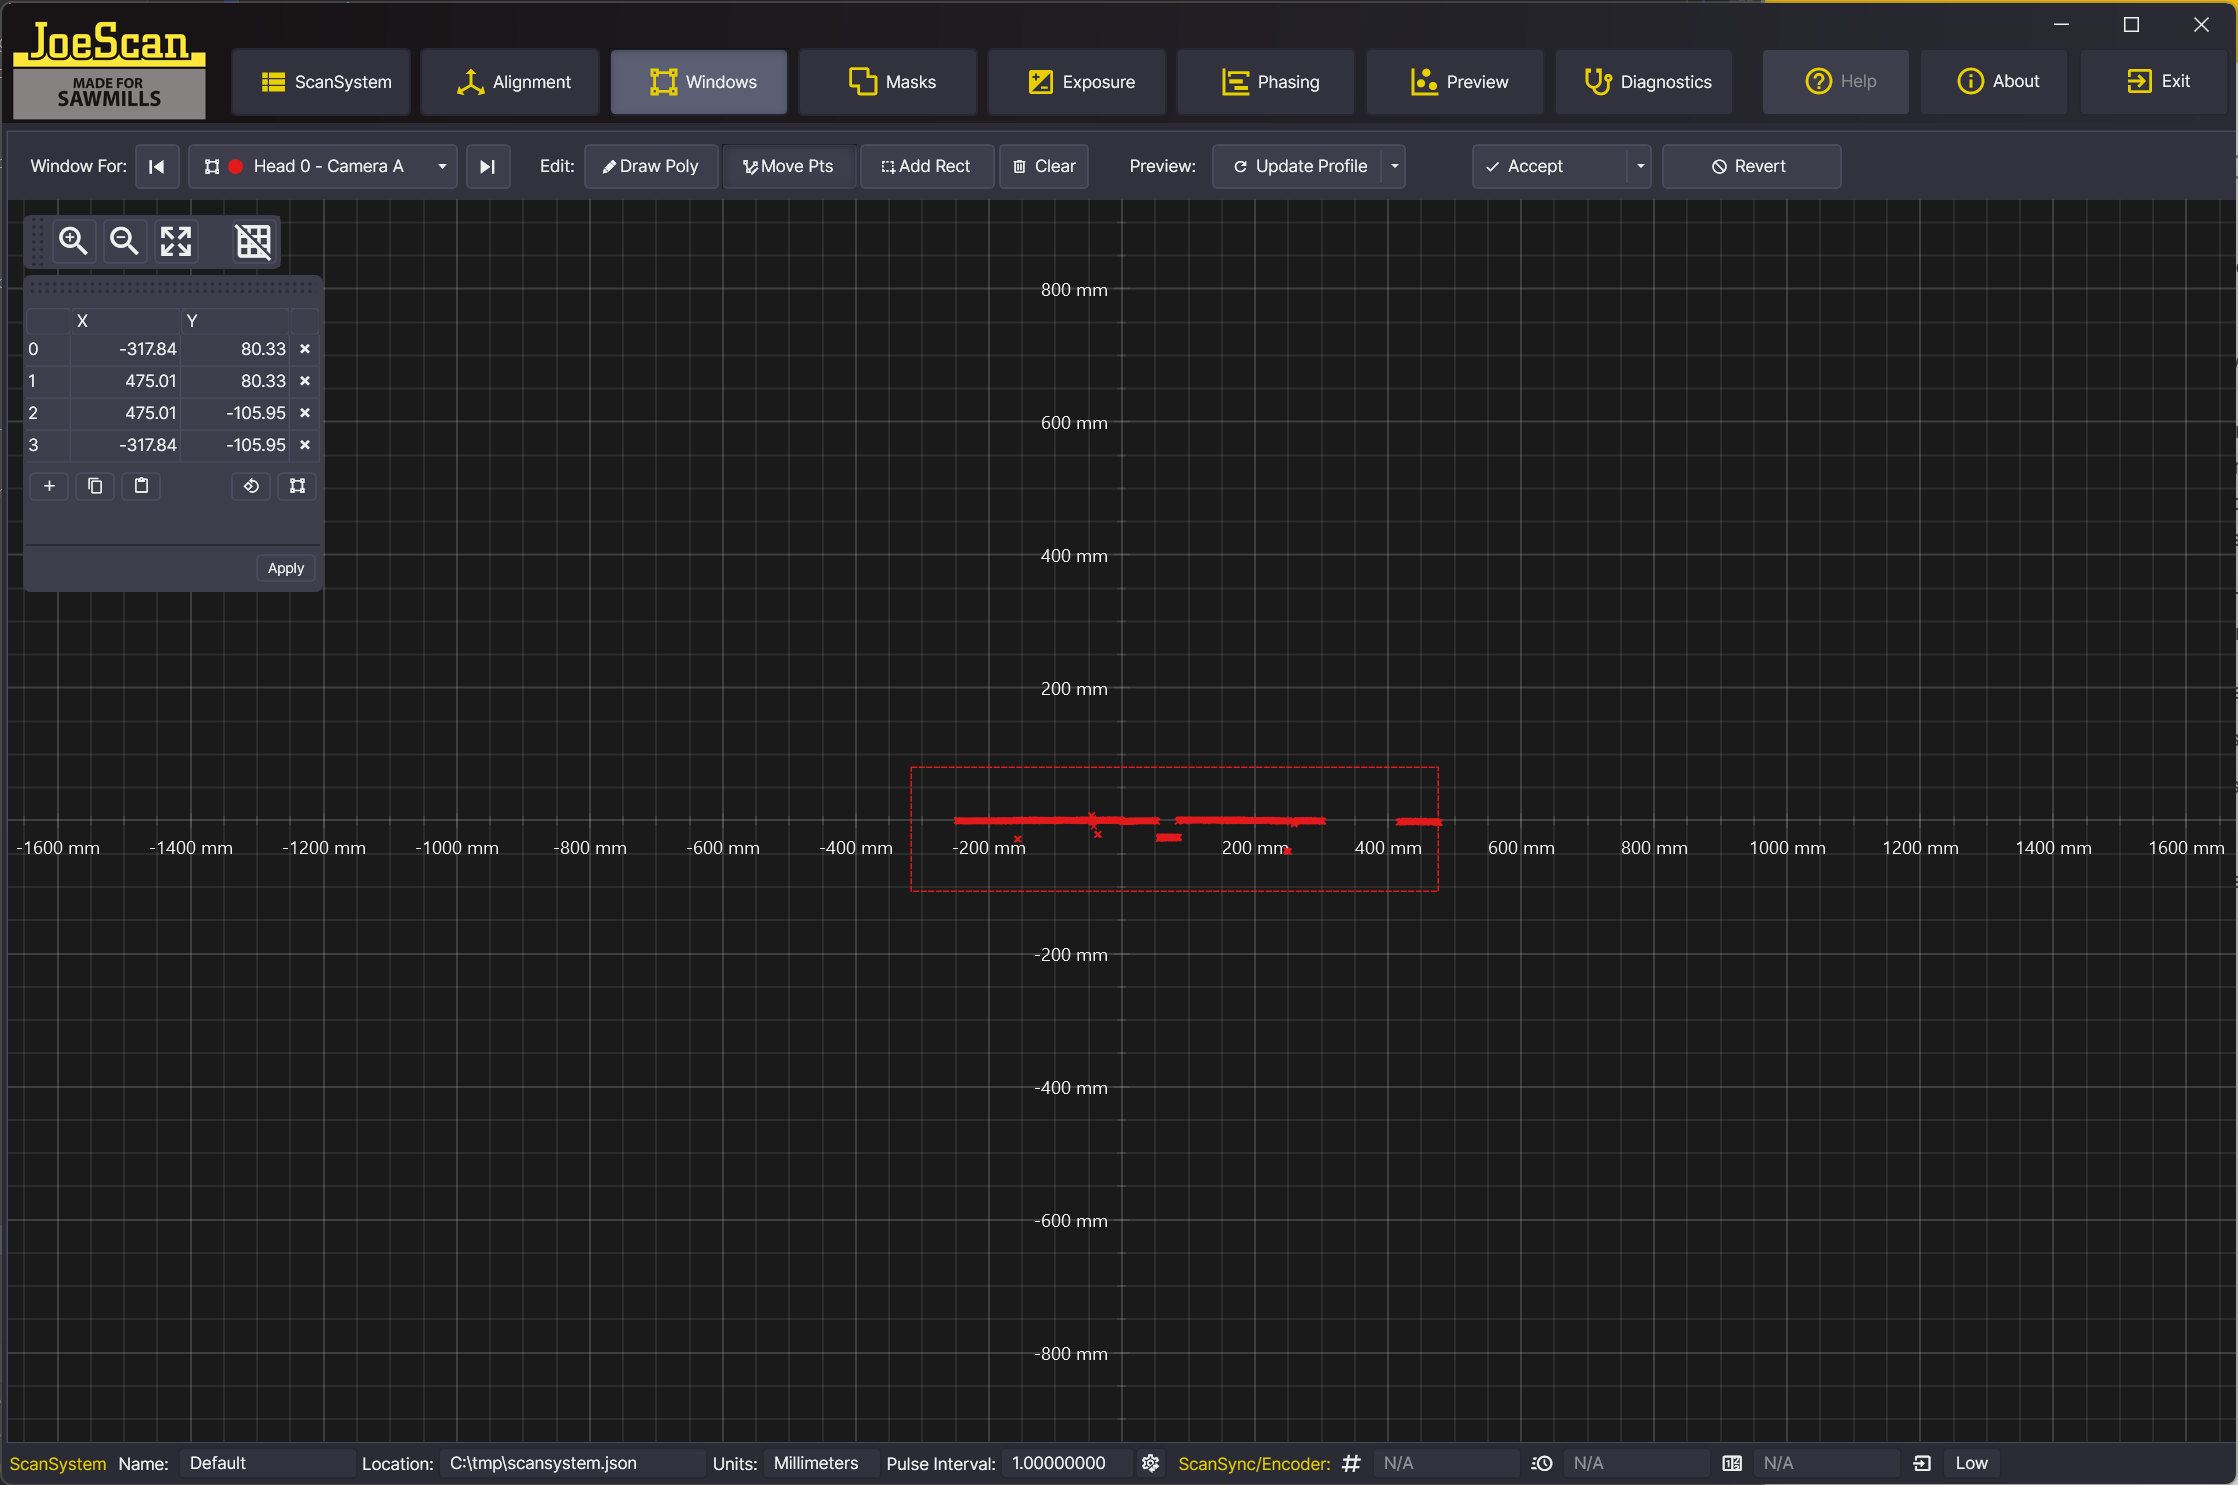
Toolbar
The tool bar contains the following elements:
Camera-Laser-Pair selector

As in other workspaces, here you can select for which Camera-Laser Pair a window should be created.
Editing Buttons

- Draw Poly: switches to the interactive drawing mode. Selecting this mode, an existing window will be deleted and you can use the mouse to draw a Scan Window.
- Left Mouse Button: add a vertex
- Right Mouse Button: close the existing polygon and exit Drawing Mode
-
Move Points: switches to the interactive editing mode. If a polygon is shown, you can "grab" vertices (not lines). Move the mouse close to a vertex and drag it to a new position.
In both modes, JsSetup will immediately correct the drawn or edited polygon to conform to the constraints listed above. A concave polygon will be modified by successively removing vertices until it is convex; and the order of points may be modified to be clockwise. Invalid polygons are rejected.
-
Add Rect: opens a dialog where you can enter values for a rectangular window.
- Clear: removes the current Scan Window.
Preview
The Preview section contains the button "Update Profile". Clicking this will retrieve a new profile for the current Camera-Laser Pair, apply the Scan Window, and display it. This button also has a dropdown menu: clicking the "Update Without Window" button (accessible through the little triangle on the right of the button) will retrieve a new profile and display it without applying the Scan Window, thus allowing you to verify you captured the area of interest correctly.
Accept and Revert
The Accept button saves the currently show Scan Window to the ScanSystem. This button also has a dropdown menu with two additional options:
- Accept for this ScanHead: saves the current Scan Window for all Camera-Laser Pairs of this ScanHead only.
-
Accept for all ScanHeads: saves the current Scan Window for all Camera-Laser Pairs.
This also comes in handy to quickly remove all windows: Use the Clear button to remove the current Scan Window, then use one of the Accept buttons to set an empty window for all Camera-Laser Pairs.
The Revert button restores a previously saved Scan Window
Scan Windows are dependent on Alignment
As stated above, Scan Windows are defined in Mill space. When no alignment is set for a Camera-Laser Pair, JsSetup will show a warning: There is no alignment set for this item. Create an alignment first before adding/editing a window.
Window Sizes and scan speed
The size of a Scan Window has a large effect on achievable scan speeds, especially in the Y-direction (up-down). It is recommended to set the Scan Window as tight as possible around the area of interest. The Phasing Editor will calculate the minimum scan period based on the Scan Windows you set here, so you can switch back and forth to observe the effect of different window sizes. Remember to Accept a Scan Window for this to work.
Point Editor Window
The Point Editor Window gives you greater control over the exact location of vertices. It has a lot of functionality, described below:
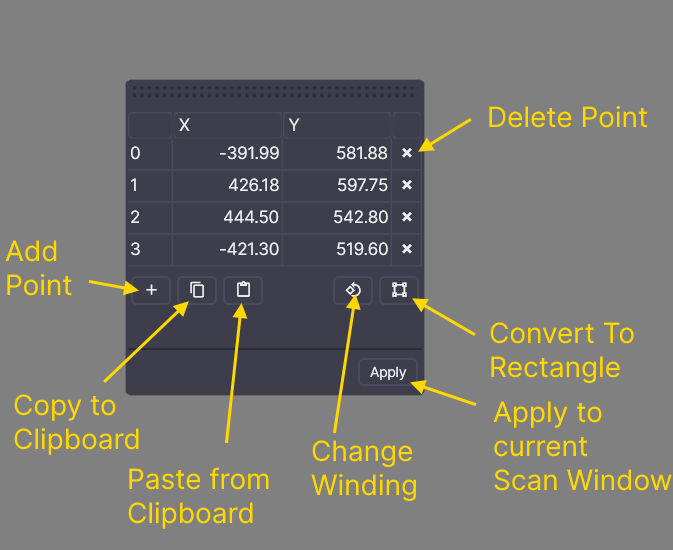
The Point Editor is updated with the current Scan Window whenever you edit the Scan Window with the mouse. When editing coordinate values in the Point Editor, a preview is shown in a white dashed line, upon clicking Apply the values are copied over and replace the drawn polygon.
The Point Editor shows a list of points that you can edit. Clicking on a value sets the cell into editing mode and you can type away. Use the Tab key to advance down the list. If you need to add additional points, click the Add Point (+) button.
The Apply button is only active when the entered data forms a valid polygon. A message above the button will appear if there are problems.
Use the Copy to Clipboard button to copy the polygon to the Windows clipboard. You can also paste the results into a text editor and edit them there.
Use the Paste from Clipboard button to replace the data in the window with the contents of the clipboard. If the clipboard is empty, the button is disabled. If the data in the clipboard is not in the right format, JsSetup will show an error and not replace the polygon.
Use the Change Winding button if you entered points that are correct, but not in a clockwise order. The error message display will read "Polygon is not clockwise" if that is the case, this button will correct the problem.
Use the Convert to Rectangle button to create a rectangular window that encloses all points currently in the list.
Each point can be deleted by clicking the Delete Point (X) button next to it.