The ScanSystem Editor Workspace
Overview
In this workspace, an overview of the parameters of the ScanSystem is shown.
The ScanSystem Editor Workspace is divided into two sections:
- the Toolbar
- the ScanSystem Editor Table
Toolbar
The toolbar contains the following buttons:
New...
Creates a new ScanSystem. This is only kept in memory and is not saved to disk until you explicitly save it. The button is disabled if a ScanSystem is already loaded. Only one ScanSystem can be loaded at a time.
Open...
Opens a ScanSystem from disk. The button is disabled if a ScanSystem is already loaded. Only one ScanSystem can be loaded at a time. For an overview of the file format, see ScanSystem File Format.
Close
Closes the currently loaded ScanSystem. The button is disabled if no ScanSystem is loaded. If the ScanSystem has unsaved changes, you will be prompted to save them, otherwise the ScanSystem is closed immediately.
Save
Saves the currently loaded ScanSystem to disk. The button is disabled if no ScanSystem is loaded. If this is a newly created ScanSystem, you will be prompted for a file name. Otherwise, the ScanSystem is saved to the file it was loaded from.
The status bar at the bottom of the window shows the name of the currently loaded ScanSystem.
Save As...
Saves the currently loaded ScanSystem to disk. The button is disabled if no ScanSystem is loaded. You will be prompted for a file name.
Discover
The "Discover" button will search the local network for JS-50 scanners and display them in a dialog. You can select one or more scanners and add them to the ScanSystem.
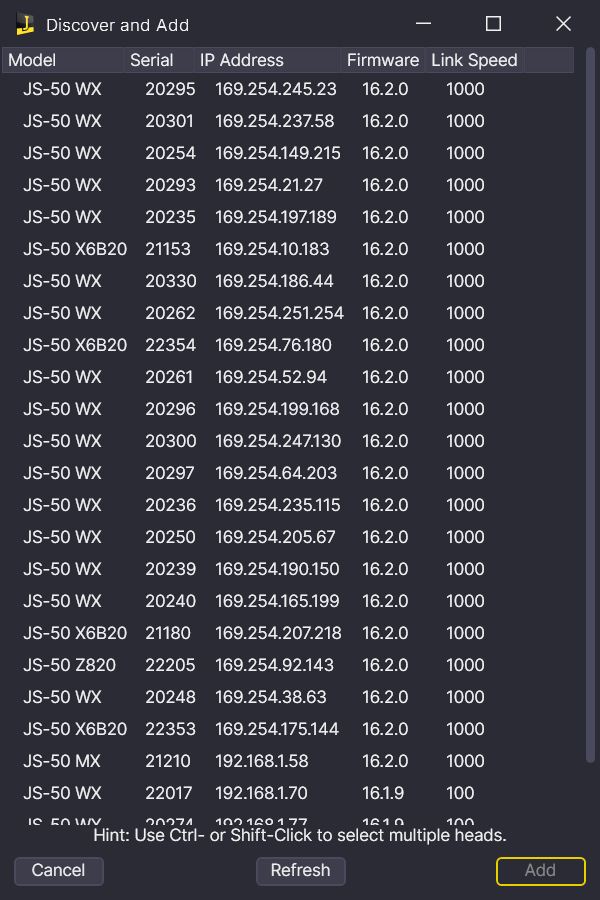
If the list is empty, make sure that the scanners are powered on and connected to the network. Also, make sure that the Windows Firewall is not blocking JsSetup from discovering scanners. See http://api.joescan.com/doc/v16/articles/firewall-settings.html for more information.
JsSetup runs a discovery check in the background periodically.
Add by Serial...
The "Add by Serial" button will open a dialog that allows you to add one or more ScanHeads by serial number. This is useful if you have a ScanHead that is not connected to the network, or if you want to add a ScanHead that is not currently powered on.
Adding a ScanHead by serial number will bypass the discovery, so it can be used with an active firewall.
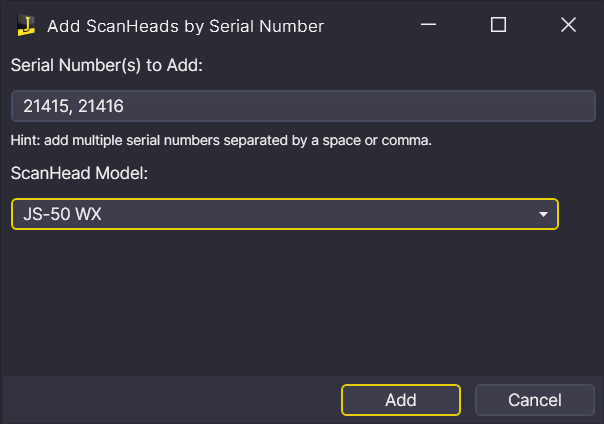
You can add multiple scanners by entering all serial numbers in the text box, separated by a comma or space.
Warning
Because the ScanHead may not be connected to the network, JsSetup cannot verify that the model is correct. If you add a ScanHead by serial number, make sure that you select the correct model from the drop-down list.
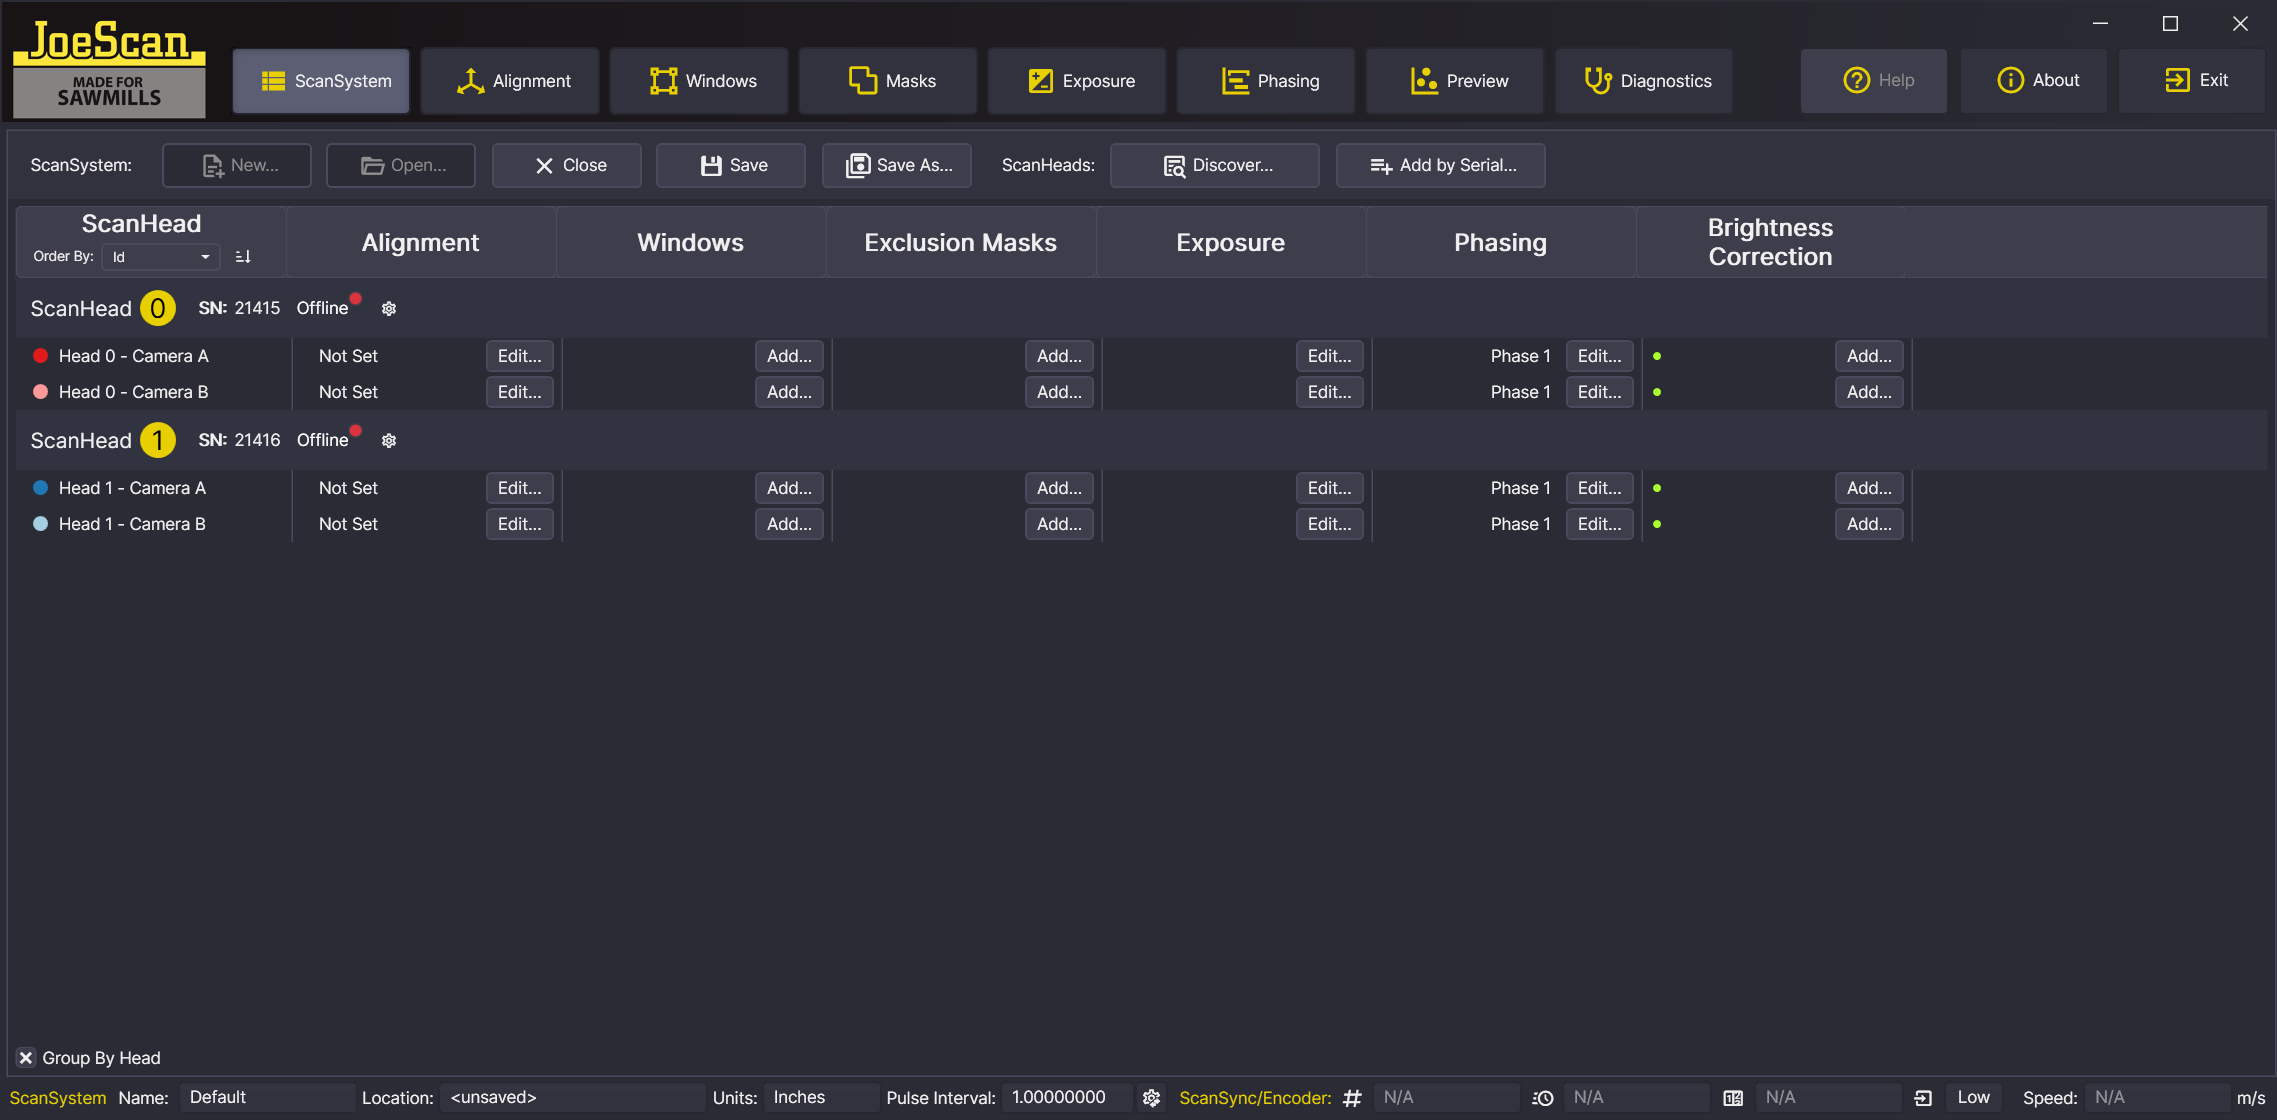
ScanSystem Editor Table
This table shows an overview of the ScanSystem. It contains columns for the most common parameters of the ScanSystem.
ScanHead Column
This column shows the individual elements of a ScanHead that can be configured, represented as Camera-Laser Pairs . The column header contains a sorting menu, allowing you to change the order in which the ScanHeads are presented. Options are
- Serial Number
- Id
The toggle button next to the sorting menu sets the order (ascending or descending). Sorting has no impact on how the finished ScanSystem behaves, it is purely for convenience.
In the bottom left corner of this column, there is also a checkbox "Group By Head", which provides a more compact view, handy for larger ScanSystems.
Alignment Column
This column shows the status and quality of the alignment for each Camera-Laser Pair. The status can be one of the following:
- Not Set: The Camera-Laser Pair does not have an alignment yet, i.e. the values for Roll, ShiftX and ShiftY are 0.
- Set: The Camera-Laser Pair has an alignment.
The quality can be one of the following:
- n/a: this is shown when the alignment values were read from the ScanSystem definition file, but the alignment was not verified on the Alignment Workspace.
-
a number: this is the quality of the alignment, expressed as the standard deviation of the residuals in ScanSystem units. The lower the number, the better the alignment. The number is colored green if the quality is good, yellow if it is acceptable, and red if it is poor. The default threshold values are:
Changing Threshold Values
The threshold values can be changed in the config file. See Config File for more information.
The column also contains a button ("Edit...") that opens the Alignment Workspace for the selected Camera-Laser Pair.
Windows Column
This column shows if a window is defined for the Camera-Laser Pair. If a window is defined, the column shows the label "Active", otherwise the column is empty.
The column also contains a button ("Add...") that opens the Window Editor Workspace for the selected Camera-Laser Pair, if no window is defined yet, or "Edit..." if a window is already defined.
Masks Column
This column shows if an exclusion mask is defined for the Camera-Laser Pair. If a mask is defined, the column shows the label "Active", otherwise the column is empty.
The column also contains a button ("Add...") that opens the Exclusion Mask Editor Workspace for the selected Camera-Laser Pair, if no mask is defined yet, or "Edit..." if a mask is already defined.
Exposure Column
This column shows the active exposure time for the ScanHead (not just the active Camera-Laser Pair). The exposure time is shown in microseconds. There are two display modes for the exposure time:
- Min/Default/Max (e.g. 100/500/1000 μs): The exposure time is automatically set by the ScanHead within those limits.
- Fixed (e.g. 100 μs): The exposure time is fixed to this specific value, i.e. the exposure time algorithm is disabled.
The column also contains a button ("Edit...") that opens the Exposure Editor Workspace for the selected ScanHead.
Phasing Column
This column shows the phase number for this Camera-Laser Pair. For details on phasing, see the Phase Table documentation. If no phase has been assigned to this Camera-Laser Pair, the column is empty. The Edit... button opens the Phasing Editor.