Exposure Editor
comments: true
Overview
The Exposure Editor allows you to fine-tune the exposure settings for each ScanHead. For the most accurate measurements, it is important to have the correct exposure settings for the specific environment, wood and application.
Exposure settings are always applied per ScanHead, not per Camera-Laser Pair.
User Interface
ScanHead List
On the left side of the window, you will find a list of all ScanHeads in the ScanSystem. Clicking on a ScanHead will expand the editor. All other ScanHeads will be collapsed and only show a summary of the exposure settings.
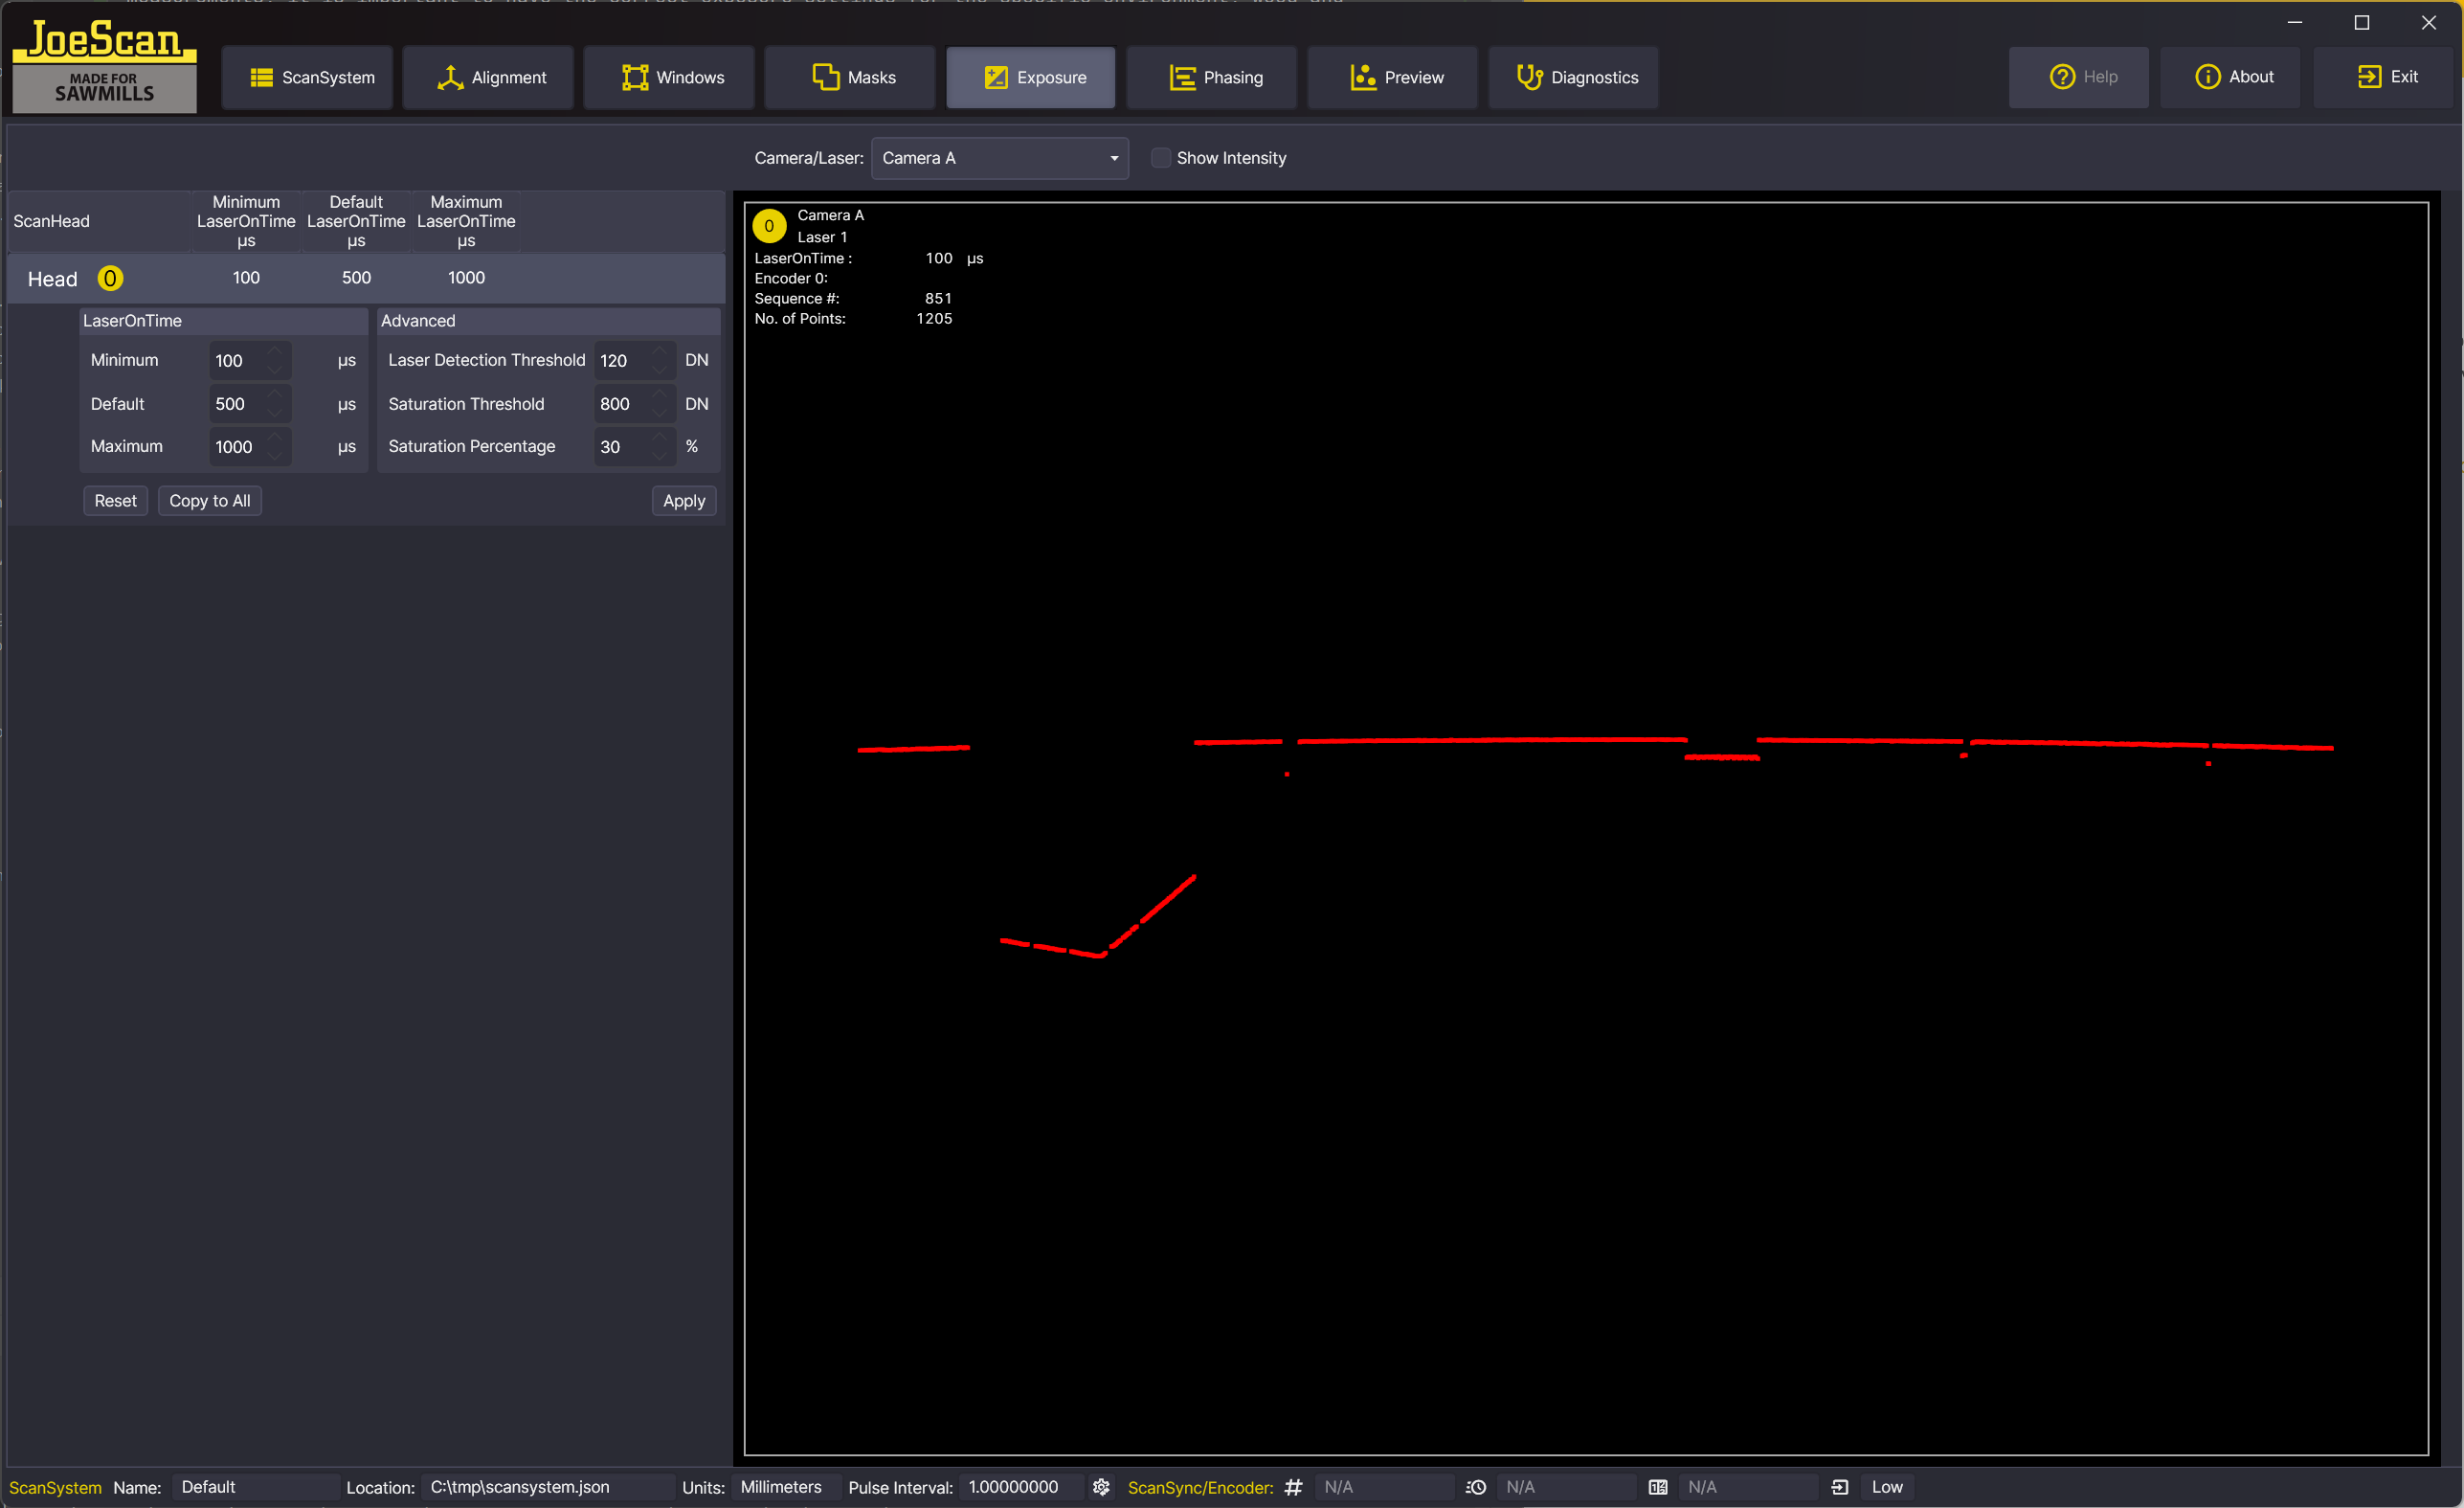
Exposure Editor
The exposure editor is divided into two sections: LaserOnTime and Advanced.
- The values for Minimum, Default and Maximum LaserOnTime are preset to the default values of the Pinchot API. Changed values are immediately applied to the preview on the right side of the window. The editor will verify that the entered values are within the allowed ranges.
- The Advanced section allows you to fine tune the values for Laser Detection Threshold, Saturation Threshold and Saturation Percentage. See the API documentation for more information on these.
The Reset button will reset all values to the default values of the Pinchot API.
The Copy To All button will copy the current exposure settings to all ScanHeads.
The Apply button will refresh the preview with the current settings.
Application of Exposure Settings
Unlike in other workspaces, the exposure settings are applied immediately. There is no need to save the settings. You can verify in the ScanSystem Editor that the settings are correct.
Exposure Settings and Scan Speed
The exposure settings have a large effect on achievable scan speeds. It is recommended to set the exposure settings as tight as possible around the area of interest. The Phasing Editor will calculate the minimum scan period based on the exposure settings you set here, so you can switch back and forth to observe the effect of different settings.
Preview Section
The right half of the Exposure Editor shows a preview of the exposure settings. The preview is updated with the current settings whenever you change a value. The display shows the found laser points in sensor space. The dropdown menu at the top allows you to select the Camera or Laser to display.
The "Show Intensity" checkbox will color-code laser points according to their brightness value.
In the top left hand corner of the preview, you will find some statistics about the current exposure. Especially the LaserOnTime field is important: it shows the actual exposure time the auto-exposure algorithm has chosen. If this value is close to the Minimum or Maximum LaserOnTime, it is a sign that the Min/Max values are set incorrectly. For more details, see here.