Network Settings
Communications with a JS-50 device occur over an Ethernet network using a TCP transport layer protocol. While the Pinchot API primarily manages communication with JS-50 devices, end users should be aware of some network-related considerations.
Network Topology
JoeScan recommends the following network topology to prevent common networking errors:
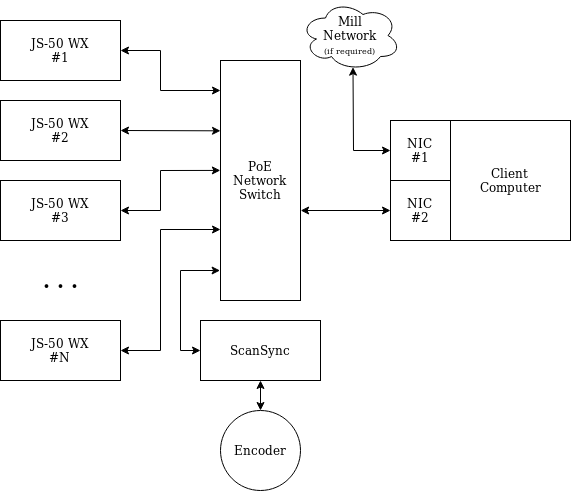
Ideally, the network should isolate all scanning devices from other network activities. To do this, use a dedicated NIC on the client computer and ensure the network switch is not bridged to other networks.
IP Address Configuration
In the absence of a DHCP server, the JS-50 automatically assigns itself a link-local IP address. This allows the devices to communicate on the same network without a DHCP server to assign IP addresses. If a DHCP server is present however, the JS-50 will use the assigned IP address instead.
Note
If there is no DHCP server on the network, the client computer must have a link-local IP address to communicate with the JS-50.
Testing Link-Local Connectivity
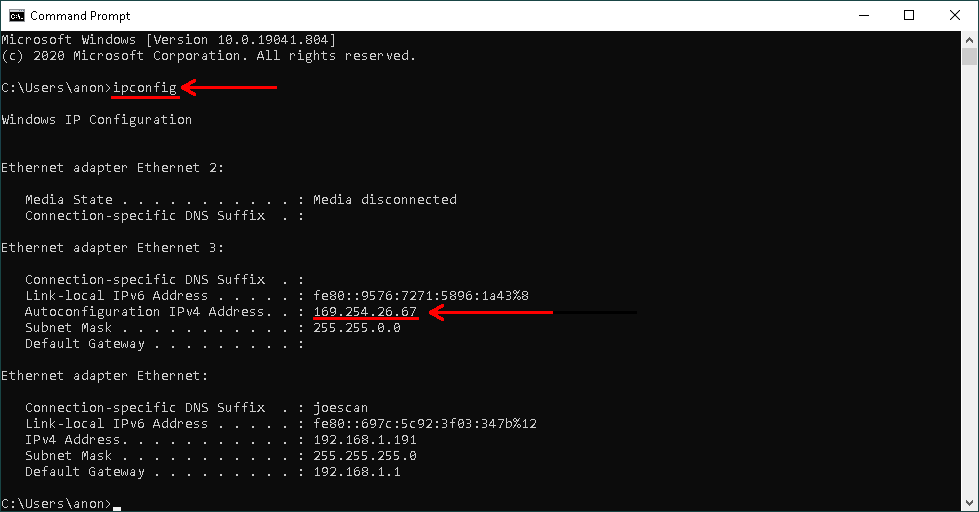
To confirm that Link-Local is functioning correctly on your system, first verify that the wired network interface connected to the scanning network has a valid Link-Local IP address. Do this by running ipconfig in the Command Prompt and checking for an IP address in the form 169.254.*.* under the desired interface.
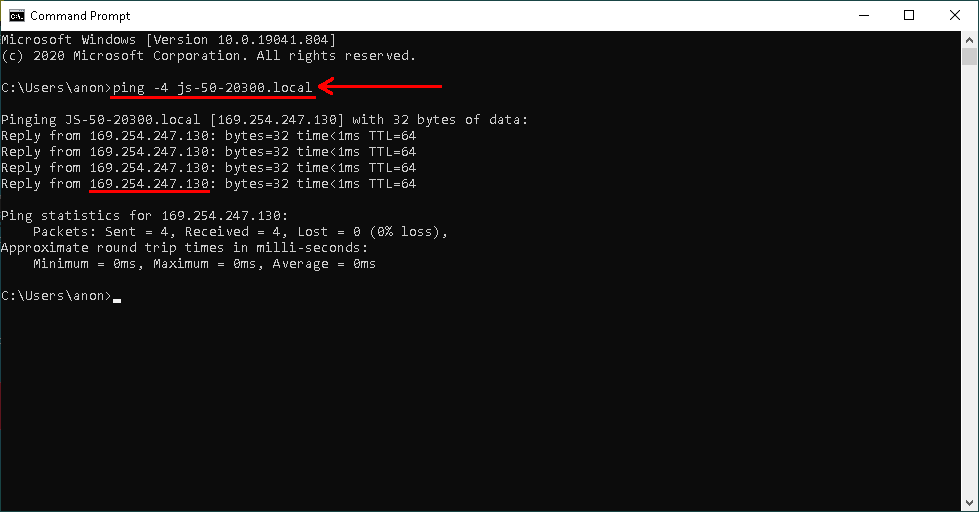
Next, ensure the JS-50 devices are properly configured. Use the ping command in Command Prompt to test if the client PC can communicate with the JS-50. Execute ping -4 js-50-<SERIAL NUMBER>.local, replacing <SERIAL NUMBER> with the actual serial number of the device. If the ping is successful and the JS-50's IP address is in the form 169.254.*.*, then the system is configured correctly.
Troubleshooting
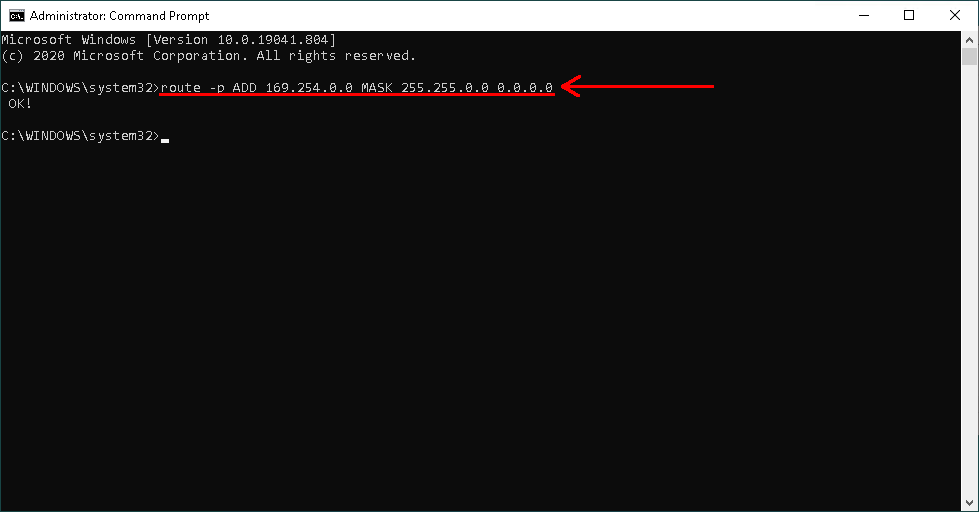
Should ping fail or if JS-50 software applications cannot connect, a common issue on Windows may be the OS's routing table not being set up to route IP packets to link-local addresses. Resolve this by running route ADD 169.254.0.0 MASK 255.255.0.0 0.0.0.0 in Command Prompt. To make this route persistent across reboots, run the command with the -p switch as an administrator: route -p ADD 169.254.0.0 MASK 255.255.0.0 0.0.0.0.
Below is an example of setting a persistent route. First, open Command Prompt as an administrator by right-clicking on it from the Start Menu and selecting Run as administrator.
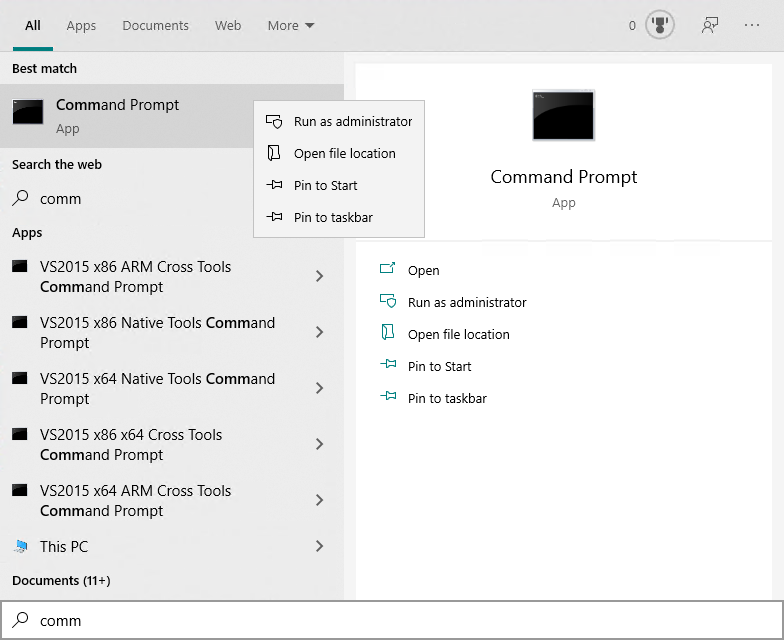
After opening Command Prompt as an administrator, run the command; a successful addition will show an Ok! message.
Network Optimization
The following approaches can enhance network performance when interfacing with JS-50 scanners.
Hardware
For systems with multiple JS-50 devices or high data throughput requirements, both the PoE Network Switch and Client Computer should support 10GbE to ensure maximum transfer speeds without data loss. A standard 1GbE network adapter may become saturated and drop packets under these conditions.
Windows Settings
Increasing Network Receive Buffer Memory
On Windows, increasing the network receive buffer memory allows the host computer to handle more network packets during heavy traffic without dropping them. Increase the buffer size by following these steps:
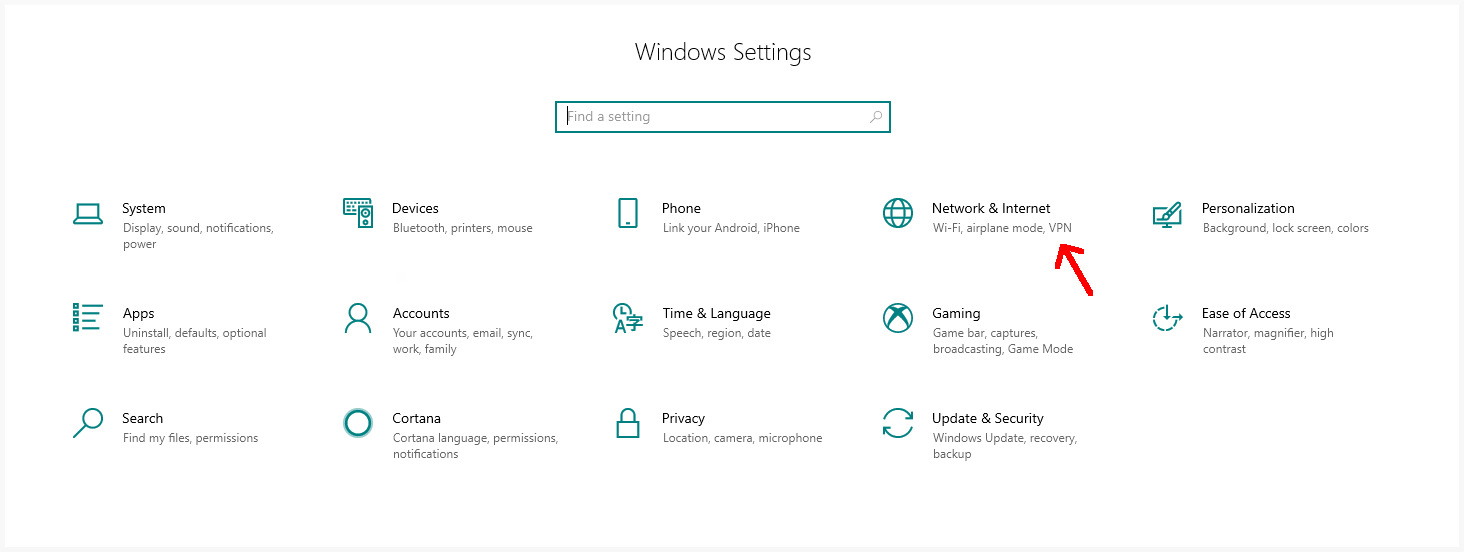
- Open the Windows Settings menu and select "Network & Internet".
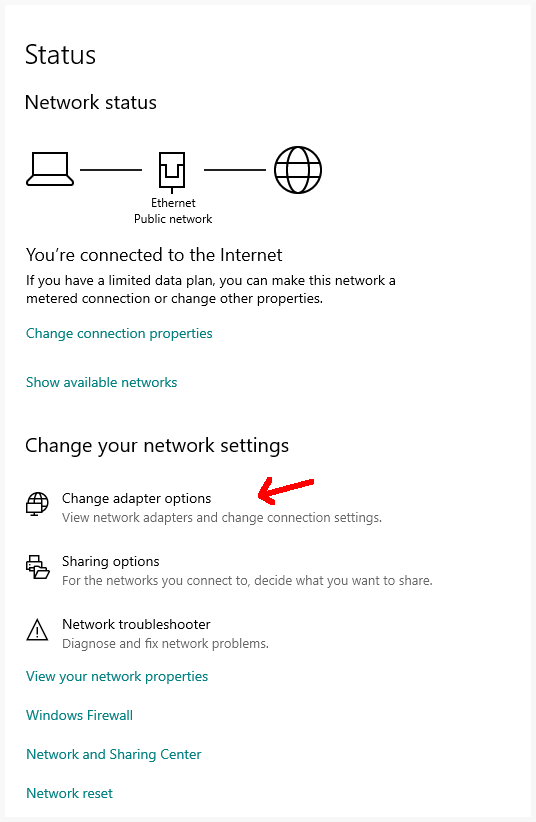
- Click on "Change adapter options".
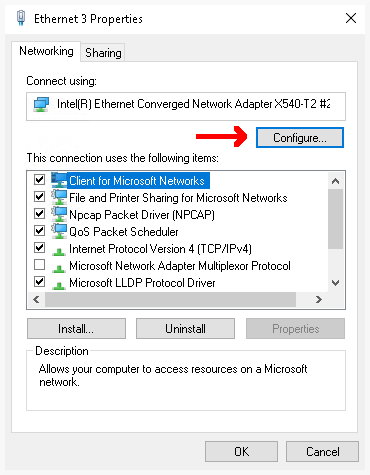
- Right-click the network adapter connected to the JS-50 devices and select "Properties".

- Click the "Configure..." button.
- Go to the "Advanced" tab, select the "Receive Buffers" property, and increase its value according to how much memory you wish to allocate for network buffering. A higher value means more memory will be used, allowing more packets to be buffered.
